Proper Care and Feeding– Music teachers

At Christmas you send a treat to school for your kids’ teacher(s).  At the end of the year maybe you send a gift too.  But what about all the other days?  Sure, some schools have teacher appreciation week, and that’s great, but that is only one week out of nine months.  Teachers have a lot to do between writing lesson plans, keeping up with grades, parent teacher conferences, any extra curricular activities that they may run, etc., etc.  On top of the regular things many teachers have to do music teachers also have to keep their music library organized, run logistics for concerts, write up concert programs, plan trips and festivals, manage their specialized classroom equipment, and more.  A little “proper care and feeding” can go a LONG way to helping a music teacher. Below find some suggestions of ways you can properly care and feed your music teacher:

  • Create a booster group of parents.  The most effective booster groups I have seen have had a president to delegate responsibilities and the support of vice presidents or committees to run things such as transportation, uniforms, music library, equipment (stands, chairs, amps, tuners, etc.), instruments, chaperones, concert logistics, fundraisers, and anything else the music teacher is willing/able to delegatPiano keys with hande.
  • Volunteer to help with accompaniment.  Choir teachers especially need assistance with this.  It is incredibly difficult to teach from behind a piano.  If your choir teacher is willing to let you help out and you can play the piano volunteer to do so.  It takes a huge load off the teacher  when they don’t have to learn the piano music to performance quality and when they can teach without having to hide behind the piano, it is much easier to manage students when you are directly in front of them
  • Volunteer to chaperone.  Most music programs attend festivals and in high school go on trips or travel with sports teams.  Often school districts require a certain ratio of adults to students and it is incredibly helpful to have a pool of parents to choose from rather than having to hunt down chaperones at the last minute.
  • no-money-clipart-money-clipart-for-teachersphilanthropy--with-no-budget---zohra-sarwar-khans-blog-vnkvfabsHelp with fundraising.  School fundraisers can be obnoxious, who wants another roll of wrapping paper or a giant tin of stale popcorn?  Help your music teacher come up with creative ways to help raise funds whether they be to help your child pay a fee, for a trip, or to purchase new equipment.  Also, be willing to help with any established fund raisers– sit at the football concessions stand, take your kid’s third cookie dough order to work, sell those coupon books to your poker buddies…  It shows the music teacher and your kid that you care.
  • On that note, be an advocate for the music classes in other parent organizations and meetings.  If the PTA has recently put on a fundraiser and is trying to figure out where to use the money, suggest the music program.  Music classrooms almost always need something, instrument repairs, piano tuning, music stands, music, chairs, new instruments… the list goes on.  Advocate for the music program and it will certainly pay off with a better education for your kids.
  • Attend concerts!  If your kid is in a sport you’d do anything in your power to attend their games, you should do the same for performing groups.  Also advertise for concerts, musicals, and other performances, brag to your friends, family, distant relatives, and coworkers about the hard work your kid (and their teachers) have put into this and encourage others to attend.  Lastly, when you do attend be the best audience member you can be– put your cell phone away, applaud loudly, and let the kids and teacher know that you recognize their hard work, no matter how young the kids may be (and how difficult the concert may have been to sit through).  Your kids will thank you and the teacher(s) will too.
  • Get your kids to lessons and rehearsals on time!
  • Enroll your kids in private lessons.  Most music teachers have their hands super full!  Think about it, music classes are often larger than a regular class, plus orchestras and bands put noisemakers into those kids’ hands then ask them to only make noise with them when instructed.  Managing that situation is HARD WORK!  Unfortunately many kids struggle and that one teacher doesn’t have the time or resources to help each kid with their individual struggles, they can address general issues, but that often doesn’t help.  The number one reason kids quit music classes is because they struggled with it, it is hard, they don’t find success, and then it isn’t fun.  Even a once a month one-on-one lesson with someone who specializes in their instrument or voice can make a hug difference in the amount of success a child has in music.  If you think private lessons aren’t something you can afford call a local teacher and talk to them, many are more than willing to work with whatever you can afford or fit into your busy schedule.  (to show their appreciation for you enrolling kids in private lessons most teachers offer some kind of incentive for them, such as extra credit, or letter points)
  • If you have a problem with the teacher take it up with them personally.  So much can be misconstrued over Parent-TeacherConferenceemail or phone.  Set up a meeting with the teacher and keep the meeting.  Be civil and realize that you (most likely) didn’t study music education in college nor are you aware of the specifics of the classroom environment, school and district rules, and other factors.  Don’t accuse a teacher of making mistakes without first investigating the situation or being willing to help come up with a solution.
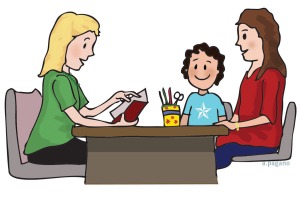
  • Make your kids practice!  You wouldn’t allow your kids get away without doing their math homework, or science homework, or history homework, so why do you let them get away without studying for their music class?  Having your kids practice tells your music teacher that you appreciate and value the subject and knowledge they are trying to impart to your kids.
  • Visit your music teacher during parent-teacher conferences.  Chances are they don’t have a line because most kids get a decent grade in music and if they aren’t parents just don’t seem to care as much.  But chances also are that the music teacher knows your kid better than their other teachers and can probably give you insight into why your child is failing math or sluffing Spanish, plus it will relieve their boredom.

Music teachers are people too!  Just like everyone else they have a lot going on, but unlike most other teachers they have more to manage than lesson plans and a classroom.  Give them a hand and you will see the immense benefits in your child’s musical education and experiences.  There’s always something you can do to help support your child’s musical education, if you don’t know what you can do just ask.

Thank you to all my friends who helped me write this post.  If you are a music teacher and don’t see something that has helped you here share it in the comments!

Let’s talk about sight reading…

I interrupt your regularly scheduled series on “The proper care and feeding of musical equipment” to give you this little post…

Those two dreaded words that pretty much every musician hates.  They make you do it for auditions.  It is part of festivals.  It is a huge part of selecting new music.  Yet we all still HATE it. What is it about sight reading that makes it so dreaded? Sight reading is a scary task.  It requires a musician to play something they have never played before and when done in front of a judge, teacher, or panel it becomes nerve wracking and even terrifying.  I believe that a large part of the reason sight reading is so dreaded is because so many of us have no organization to our method of attempting to sight read. Without realizing we are doing it most musicians begin sight reading a piece by finding what we believe will be the mostconfused-doubting-baby difficult part of the piece and fingering through that part as many times as we can before we are required to perform.  Others just start fingering through the piece from the beginning in the hope that we will make it far enough through for the effort to have been worth the time.  Some just stare at the music until it becomes a blur, not comprehending any of the lines and dots on the page.  These disorganized methods often cause confusion, but may occasionally supply small successes. When I was in a practicum class in college the teacher I was working with assigned me to sight read a piece with his band.  I knew how difficult sight reading a piece for just myself was, I was terrified of sight reading a piece not only by myself, but also guiding a group of sixth and seventh graders through a process that would make it a successful read.  The day before my assignment was to take place this teacher taught me his sight reading method that he uses personally as well as with his students.  I am going to share it with you here.  This sight reading method breaks sight reading down into four basic parts of music that makes sight reading far less intimidating. Steps for sight reading:shutterstock_70014118

  1. Road map:  When you are planning a trip you try to familiarize yourself with the route you will have to take.  You decide which highways to use, which stops to make, and may even investigate speed limits to find the quickest way.  Sight reading music should be the same, you should look at the direction of the piece and look for anything that is going to start, stop, slow, speed, or turn you around while you play.  This includes ritardando, fermata, tempo, repeats, D.C., coda, signs, etc.  Take note of all these, trace the road map with your finger quickly, and maybe even ask if you will be required to play all the repeats.  This step does not include changes in rhythm, changes in time signature, changes in key, dynamics, style, etc.
  2. Rhythm:  Correct rhythm is vital to music, without it everything with the same notes and keys would sound the same and we would have run out of new music a long time ago.  When sight reading you should scan the piece for essential rhythmic notation.  Check the time signature, look for any changes to it, and find any rhythms that look unfamiliar or difficult, check out any ties, and don’t forget the rests.  Clap or play difficult rhythms, if you can write on the music write the counting in (IN PENCIL!).  This step does not include notes that you may not know fingerings for or have to count ledger lines to figure out, dynamics, articulation, key signature, or anything in the road map step.
  3. Notes: Now you finally get to investigate the key signature and the notes.  Notes come third because if you are in ayToe4dnjc time crunch this is something that should come easier than road mapping and unfamiliar rhythms.  When you get to investigating the notes first check out the key and make sure you know all the flats and/or sharps.  Next, look for notes that you are unfamiliar with, count ledger lines, check fingerings, and maybe even write note names in (IN PENCIL!).  Last, but not least, check for accidentals, make note of them and where they happen, remember the accidental rule (if a note is marked at the beginning of the measure the accidental applies to the whole measure and it goes back to normal at the bar-line).  This step does not include articulation, dynamics, rhythms, or anything in the road map.  (Choir teachers can use this step to discus pronunciation, especially when singing in a foreign language.)
  4. Anything else:  If you have time you can now look at any of the other lines, dots, and words that make the music really interesting.  Check dynamics, articulations, style, and any of those other nitty-gritty things that are often at the back of the mind when sight reading.  This step is last because these are some of the less important components when sight reading, judges and juries take into account that sight reading isn’t going to be perfect and likely won’t involve a lot of the more detailed parts of music performance.

I have been using and teaching this method for 4 years, both to private student and classrooms.  It takes some time to get used to, but after a few tries students start to really understand the benefits of these steps and start to apply them without instruction.  If you struggle the first time around, don’t give up!  Try it a few more times, and really take your time.  Allow students the chance to participate by finding each of the components to each step themselves.  Correct students when they associate rhythms with the road map, remind them that you are only talking about rhythm when they ask for a fingering during step two, and teach them about new concepts during step four. Another tip is to sight read with the kids.  Choose a piece that you are unfamiliar with.  Take a short look at it before handing it to your class to determine if it is appropriate for their level, then put it away until you are ready to read it with the students.  When students see that sight reading is something that you are willing to do with them they feel less frightened of it. When sight reading is broken down into more manageable pieces it becomes less intimidating and more manageable for students.  When a task is less intimidating students find greater levels of success.  When students find success teachers find success.  When teachers and students are successful music is fun and everybody is happy. This method can be done quickly as needed or can be done in a classroom more slowly so as to really understand the music before reading it.  Student do well with this method because it helps them break the music down into more manageable pieces.

Proper Care and Feeding– Violin and Viola

Today’s post comes from a guest poster: clarissaClarissa Lunt is an orchestra teacher at Mar Lon Hills Elementary and Municipal Elementary in Weber School District, Utah. She is the Viola Section Leader with the Davis County Symphony in Utah and serves as the Public Relations Representative on the Symphony Board. Clarissa also teaches violin and viola lessons from her home in Ogden, Utah. Clarissa has a degree in Music Education emphasis in String Orchestra from BYU-Idaho and has played the viola for over 15 years. She worked at Ferguson Music Company as the Rental and Repairs Manager for four years while earning her degree. There she learned valuable lessons on string instrument care, maintenance and repairs. Clarissa has two beautiful daughters and loves being a mother. Her hobbies include reading, swimming, and mixed martial arts.

No Assembly Required!

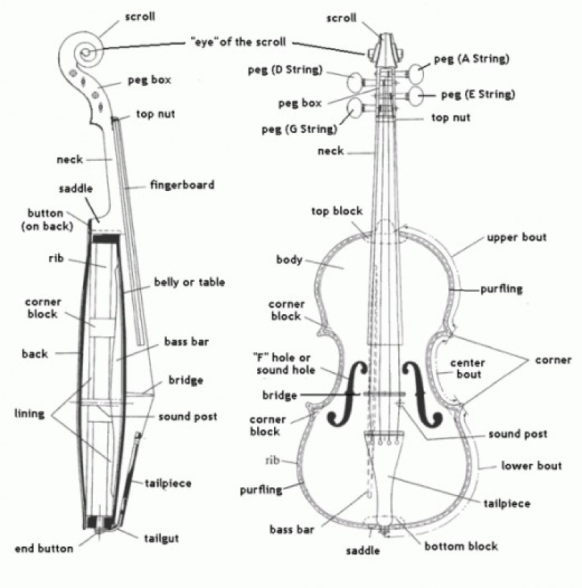
One of the great things about stringed instruments is there’s no set up requirements to play. You can simply take it out of the case and play. For beginners I always recommend you put the case face up on the floor before opening. Then take out your instrument by the neck or shoulder. Cellos and basses need to remove the bow from the case first. For all stringed instruments, remember to hold the bow by the stick – don’t touch the bow hairs. That’s it, now you can play! Violins and violas should attach a shoulder rest to the back of their instrument. Attach the feet securely to the back of the instrument. Adjust the shoulder rest so you’re most comfortable, for most this is when the scoop of the shoulder rest is underneath the chinrest. strings Tuning & Re-stringing I don’t recommend trying to tune or re-string a stringed instrument until you have been playing long enough to understand responsibility for your fragile instrument and have developed an ear for tuning. One thing to understand is that the pegs are actually slightly more cone-shaped than cylindrical. You need to push the pegs into the peg box while supporting the scroll when turning the pegs to get them to stay in tune. Turn the peg towards the scroll to make the string sound higher and towards the body of the instrument to lower the sound. It’s a pretty simple concept. However, developing the dexterity in your hands to push and turn and cradle the scroll at the same time is difficult for younger kids. Also, a quarter turn of a peg can adjust the sound as much as two whole steps (two white keys on a piano) depending on the size of the instrument. A whole turn could break a string. It’s best to start tuning with fine tuners to develop your ear before learning how to tune with the pegs. With fine tuners, turning right makes the string sound slightly higher, and turning left lowers the pitch of the string. Also, make sure you’re tuning the correct string. When I was in 8th grade, I had learned to tune my viola fairly well and a violin playing friend needed help tuning their A-string. So, I started turning the peg that would have been A on my viola, which was the E string on his violin and I accidentally broke his string. Oops! At least E strings are the cheapest string. If you are already experienced at tuning your instrument, re-stringing is easy. It’s easier to show you how to re-string than to explain it. Ask your teacher or someone who works at a violin shop to show you how to re-string. If you cannot learn in person, a video is the next best thing. Here’s an informative video on re-stringing a violin.

The Dos of Instrument Care

Do check for damage when you get your instrument and continue to check for damage routinely. When you first take your stringed instrument out of its case, check for cracks, scratches, dings, broken strings, etc. If this is a rental (either from school or from a store) notify the manager or teacher to make note so you are not held responsible for these scratches if/when you return the instrument. If you are renting from a store, sometimes you can talk the price down with the sales rep because of scratches. Cracks will need to be repaired. Sometimes cracks are hard to see. The hard-to-see cracks look like a lighter line in the grain of the wood. Press down firmly but gently with your finger next to the line, if it gets wider, it’s a crack. If it stays the same it’s either a crack that’s been repaired or that’s just what the wood of the instrument looks like. Sometimes cracks are an easy repair, sometimes they’re more expensive – it depends on the size and location of the crack. I regularly check for cracks on my violin and viola whenever there is a change in seasonal weather – that’s when wooden instruments are most prone to cracking. Broken strings are an easy fix and most stores will restring a violin for only the cost of the string. If you’re renting from a music store and the instrument has a broken string, sometimes they’ll replace it for free.

Do keep your instrument stored at room temperature. String instruments are made of wood. Wooden instruments are susceptible to temperature changes. Just like when the weather changes outside your wooden front door is hard to open, string instruments change with weather change. If a stringed instrument gets too hot, the varnish will melt. If a stringed instrument gets too cold, the wood can crack. My recommendation is if you wouldn’t be comfortable with the temperature where you’re leaving your stringed instrument, don’t leave your instrument there either, even if it’s in its case.

Do use rosin. Rosin (dried tree sap) is essential to playing with the bow. Rosin sticks to the horse hair on the bow and makes the horse hair sticky. The horse hair is then able to pull the string to produce a sound with the bow. I rosin my bow for approximately every three hours of playing. If I’m practicing three hours a day, then I rosin every day. If you’re a beginner and only playing about three hours a week of combined class and practice time, then you only need to rosin once a week. If you have a new bow, or it has recently been re-haired, you will need to rosin a lot to get your bow to play correctly. Here’s a video explaining how to apply rosin to your bow.

Do use a shoulder rest or sponge. Shoulder rests help support the violin on your shoulder. They add padding for shoulder comfort and fills the space from the shoulder where the violin rests to the chin (which helps stabilize the violin on your shoulder ) so you’re not straining your neck trying to clench the violin onto your shoulder (clenching is bad). As much as I LOVE my students to own a shoulder rest, there are some brands of shoulder rests out there that areshoulderrest prone to scratching the instrument. Make sure the feet or prongs of the shoulder rest that attach onto the lower bout of the instrument are plastic or rubber. Some shoulder rests have metal feet that scratch the wood of the instrument. If you cannot afford a good quality shoulder rest, I recommend getting a soft sponge and using that as a shoulder rest by attaching it to the instrument with a rubber band connected to the back corner and the end button. I used a sponge as a shoulder rest for the first couple years of playing viola and it worked quite well. If you’re looking for a shoulder rest and don’t know where to start, I like the KUN brand shoulder rests. They’re the easiest to adjust to your comfort needs and also the easiest to replace parts if they break.

Do wipe off the rosin dust and finger prints. All you need is a soft cloth. It doesn’t have to be a special instrument polishing cloth that music stores try to sell you for $2. Any cloth or rag that is soft, lint-free, and clean will work. I use a clean burp rag that my babies have outgrown. Gently wipe off the rosin from the wood of the instrument. Then gently rub the rosin off the strings too. It is best to wipe off the rosin daily to avoid having rosin dust caking on the strings or the wood and causing the strings to wear quickly or the wood to become permanently sticky.

Do put away securely. A lot of damage I’ve seen to instruments in the classroom happens when students are putting their instruments away or if their instruments are left unattended (which rarely happens in class). Make sure you latch all the latches, stick all the velcro, zip all the zippers, etc. All students, make sure you loosen the bow before putting it away. The tip is very fragile and if left tightened while stored, it puts lots of strain on the bow and will crack and break over time. Violins and Violas make sure you remove your shoulder rest before putting your instrument in its case. If the lid closes on the instrument with the shoulder rest on the back, it will crack. Put the shoulder rest in a shoulder rest compartment of the case, or if your case does not have one, in a music bag. Also, make sure your bow is latched in place before closing the lid, the bow could scratch the wood.

The Don’ts of Instrument Care

Don’t leave your instrument in the car. There are three reasons not to leave your instrument in the car.

  1. It could get too hot and the varnish could melt which is irreparable.
  2. It could get too cold and the wood could crack which is expensive to repair.
  3. It could get stolen.

Don’t leave unattended. If you’re done practicing your instrument, put it back in its case securely. Be especially careful if you have dogs, cats, or young children in your home. Students will put their instrument down for a second to get a drink of water and the next thing they know their dog, cat, or baby sister is using their violin as a chew toy.

Don’t try to fix the instrument yourself. When I worked at Ferguson Music Company, I would get rentals returned with screws or super glue holding the wood together. Even wood-glue is bad for a stringed instrument. Stringed instruments are works of art that appreciate with value if made and maintained with care. In order to get the best acoustics from an instrument, violin makers use special glue, varnish, and tools to create an instrument that sounds beautiful and will continue to sound beautiful for thousands of years. Some people may know what they’re doing with nails, screws, super glue, and wood glue, and it may even hold the instrument together and it might even play, but the vibrations from playing on these repairs cause even more damage to the instrument. Often the damaged caused by fix-its is more expensive to repair than the original damage to the instrument.

Don’t use household cleaners on your instrument. Along the same lines of “don’t fix the instrument yourself.” Household cleaners cause irreparable damage to stringed instruments. Even pledge and wood polish are bad for instrument varnish. One time, when I worked at Ferguson Music, a customer brought in her violin and the varnish had melted. I asked what had happened and she said she had used Windex to clean it. The varnish was irreparable and we had to strip all the varnish off along with a layer of wood and re-varnish the instrument. If you need to clean your instrument, use special violin cleaner and polish. Don’t polish too often though, too many layers of polish deaden the sound of stringed instruments. I only polish once a year.

Don’t touch the bow hair. The horse hairs on the bow have many microscopic ridges on them. When applied with rosin, the horse hairs grip the instrument’s strings and pull causing it to vibrate and ring with sound. Our skin has many natural oils. When you touch the bow hair with your hand, the oils from your hand fill up the ridges in the horse hair making the bow ineffective, or at least making it not sound so pretty. Bow hair that has been touched too many times turns yellow, then brown, then black and it sounds scratchy.

Don’t touch the pegs until you learn how to tune. The number one reason a string breaks is a student has turned the peg too far. I don’t teach my kids to tune their own instruments until they’ve been playing a year or more. They need to show responsibility for their instruments and learn how to tell if they’re in tune. They need to demonstrate the ability to tune with the fine tuners before I’ll let them use the pegs. Your teacher can tune you in your lessons. If you need your instrument tuned in between lessons, take it to a music store – they usually tune it for free.

Resources:

“Violin Bow Parts Diagram.” Becuo. September 2009. http://becuo.com/violin-bow-parts-diagram

“Kun Original Violin Shoulder Rest” Shar. 7 February 2015. http://www.sharmusic.com/Accessories/Shoulder-Rests/Kun-Original-Violin-Shoulder-Rest-fits-3-4—4-4-size.axd#sthash.9l2Dt5OC.dpbs