Proper Care and Feeding: Miscellaneous Classroom Equipment

Music classrooms are unique from other classrooms in that they don’t have the standard desks, chairs, and annual textbooks.  Instead they have music stands, risers, posture chairs, sheet music, and various other pieces of equipment that are necessary to provide classroom music education.  This post is intended to provide general information in regards to some of the more common pieces of equipment found in most music classrooms.  Please refer to owners manuals and your particular classroom for more specific care needs. pict01
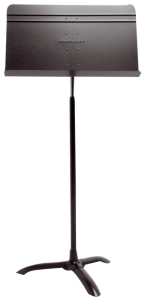
Music Stands:  My general rule to maintain music stands is to insist that students do nothing to a music stand that they wouldn’t want done to their face.  This includes (but is not limited to) writing on them, spinning them, laying them flat to use as a desk, sword fighting, or using them as dominoes (yes, I have seen all of these).  I highly recommend storage on a stand rack when not in use so students are not tempted to play with them, and a yearly cleaning and blot check.  Cleaning can be done with a general use cleaner, soft cloth, and water, or some kind of cleaning wipe that is not abrasive, on of the best times to do this is at the end of the school year– have students help clean the stands then put them away for the summer.  Also be sure to check the bolt on the bottom of the stand at least once a year and use a proper wrench or socket tool to tighten loose bolts.  These are also the recommendations from the Wenger Company’s music stand owner’s manual.

student-chairPosture Chairs:  Taking good care of posture chairs is similar to that of the music stands.  Chairs should not be used for anything but sitting, and to maintain the caps on the bottom of the feet chairs should not be dragged across the floor.  Chairs should be stacked when not in use, because of the unique construction of posture chairs, however, they can only be stacked about five high, when stacking on the floor.  To conserve space chair racks can hold more in the same space of two stacks of five.  Chairs should also be cleaned yearly with a mild cleaner and soft cloth, also check for gum tucked under the seats.

Risers:  Follow all instructions for storage, assembly and take down in the owners manual.  Students should not be allowed to jump or otherwise rough-house on risers, as much for their own safety as to keep the risers in working order.

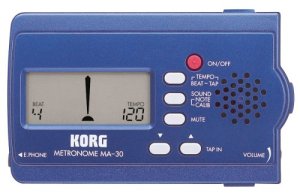
Tuners, metronomes, keyboards, etc.:  Label all school equipment in permanent ink and/or with a barcode, this will51dPhgqjjeL help prevent theft.  Check all batteries and cords regularly and replace as necessary.  Roll cords in a manner so that they will not twist, this will extend the life of cords and cables.  Clean items as appropriate with damp cloth, never immerse.
School mouthpieces and mutes:  Label all school items with permanent ink and.or a barcode to prevent theft.  Clean regularly with appropriate cleaners.
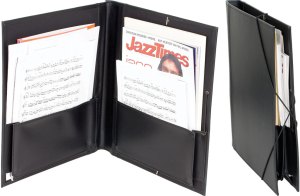
10043931Sheet music:  Instead of a textbook that is handed out at the beginning of a term and collected at the end, music teachers hand out sheet music many times every year.  Music is hard to keep track of and can be even more difficult to organize.  One of the best organization systems I have seen was student managed at a high school.  The music was organized alphabetically by ensemble and each part was numbered.  Numbering each piece made it very easy to put music away and made it very obvious when a part was missing.  The best part of this system was that each student was held responsible for their part.  This was done by taking down the number of each part each student had.  This may seem tedious and time consuming, but when it is student managed, supervised by a parent or the teacher, it really is efficient.  By making note of what number part each student has they can be held responsible for lost and/or excessive damage to sheet music, just as they are held responsible for text books in other classrooms.  Finally a computer file is kept of all the pieces so as to record when they have been removed from the library and when they have been returned with additional notes about the piece such as type of ensemble, composer/arranger, performances, missing parts, and conductor’s notes.  Students should be strongly advised to only write on music in pencil and required to erase all marks before turning in any music.  Also, teachers should provide folder for students to store music in, whether these be leather folders, binders, or cardboard folders the music stores hand out doesn’t matter, so much as there is something there to protect this valuable investment.  In the case of copies– students should still be held responsible for caring for copies– if damage and carelessness is allowed because it’s “just a copy” students will become careless about music that isn’t copied.
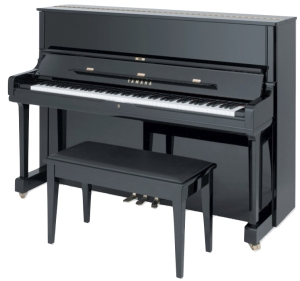
Upright-PianoPianos and other classroom instruments:  No matter the value of classroom instruments students should be taught to respect them.  Students should not be allowed to abuse any classroom instruments from cheap kazoos and egg shakers up to the grand piano or tympani.  Students should be taught to use cases and covers where applicable, to not store backpacks, books, etc. on top of them, and to only use them for their proper functions.  It is up to individual teachers to set rules in regards to classroom instruments especially large instruments such as pianos. Music classroom equipment should be respected and taken care of as well as, if not better than, equipment found in standard classrooms, as it often represents a more significant expense on the part of the school.  Students should be taught to respect and care for music classroom equipment, and what better way than to allow them to opportunity to help.  When classroom equipment is given proper care and maintenance it will last a long time and be worth the expense.  When students are taught proper care of this special equipment and allowed to help maintain it they realize the value and take more responsibility for its “proper care and feeding .”

When given the opportunity to help maintain classroom equipment students are more likely to respect it.  Rules should be set an enforced when it comes to the treatment of specialized music classroom equipment.  This will ensure that the investment is worth the expense.

What other specialized equipment do you have in your music classroom and how do you take care of it?

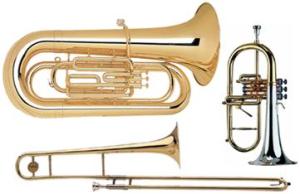
Proper Care and Feeding– Low Brass

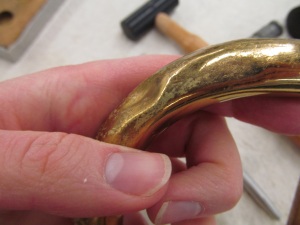
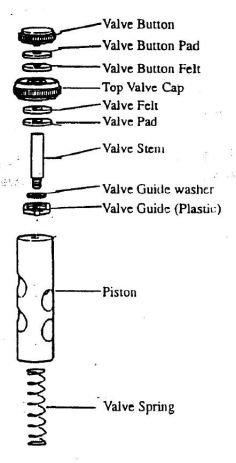
Chris Lyon is my awesome guest poster for this post. i-W8MZvq4-LChris is an Assistant Director and Low Brass Instructor with the Bingham Marching “Miner” Band and has served in this position since the fall of 2010. He is currently the Director of Bands at Elk Ridge Middle School. He has taught band in the classroom for eight years, with the last five being at his current position. Mr. Lyon has a Masters of Education from SUU, a Bachelors of Music from BYU, an Associate of Arts from Snow College, and is currently working on his School Administration endorsement. While in college, Mr. Lyon studied bass trombone performance and has performed across the Salt Lake, Utah valley with groups including the Utah Symphony, various Broadway musicals, and in several big bands.  Mr. Lyon resides in West Jordan with his beautiful wife, his two amazing daughters, and his awesome son. He is an active member of his local church organization, is a leader in his community, and speaks fluent Portuguese. In his free time, Mr. Lyon enjoys playing and watching soccer, spending time with his wife, and playing with his children. imageMain_7_16Low Brass maintenance is an interesting thing to think about because, unlike the woodwinds, we don’t swab out the inside of our instrument after we play. Because of that, preventative maintenance is so important. It is vital that we remember that whatever is in our mouth will end up in our instrument. What that means is that oral hygiene is critical for maintaining your low brass instrument. There is a condition called trombone lung, in which a lung becomes infected from the fungi and other cultures grown inside a low brass instrument. I consulted with a dear friend and mentor, Victor Neves (tuba player, band director, and owner of the business/website bandtek.com) in preparing for this article and we were able to come up with the following suggestions. Cleaning your instrument: It is important to keep our instruments clean. Keeping the outside of our instrument shiny is easy because we can always 51jttzZOIBL._SY355_see it, but it is easy to neglect the inside of our instruments. My recommendation is to bathe your instrument monthly or every other month (depending on how much you use the instrument). To bathe your instrument, fill your bath tub with enough lukewarm water (NO SOAP) to completely immerse the instrument. Take your instrument apart and set it in the water and let it soak for a few hours. This gives the water time to break down the gunk in your horn. DO NOT put piston valves in the water because it will water-log the felt inside the valve mechanism. After the instrument has had time to soak get a cleaning snake and run it through all of the tubing. If you play trombone get a cleaning rod, wrap a non-shedding cleaning cloth around it (make sure it won’t get stuck in the slide), and run it through both the inner and outer slides. To clean the gunk off of the tuning slides get a scotch-brite pad from the local grocery store and scrub the part that goes inside the horn. Be careful not to let it touch the lacquer of the instrument because it will rub off. This pad can also be used to clean the shank of the mouthpiece. Do not clean your instrument right before a performance. As an instrument gets dirty, air resistance will build. If you clean it right before a performance you mess with the resistance that you are used to which can have a negative impact on your performance. Another reason to avoid cleaning right before a performance is because, if something goes wrong, you don’t have time to get it fixed (trust me, I’ve learned from experience…). Lubricating your instrument: The best valve oil for piston valve instruments is All Cass, it’s not terribly expensive, works very well, and doesn’t leave much of a residue on the valve. Rotor valves are made differently and require two different types of oil. For the internal mechanism any rotor oil will suffice (one repair tech told me that pure candle oil is the same thing), but for the outer mechanism use “air tool oil”. Lubricating your trombone slide is crucial to keeping your slide in working condition. If you hear grinding while you play, your trombone is past the need of lubrication. I used “Slide-o-mix” on my trombone for years and it always served me well. Lately I have been using a cream called “Trombotine” and I have been pleased with the results. “Superslick” is another popular brand. Whenever you lube your slide, first wipe off the old gunk with a rag. Then apply the lubricant. Once that’s worked in the slide, get a small spray bottle and spray the inner slide with water. Oil and water don’t mix, so the water beads up on the slide creating ball bearings for the slide to glide on. When the slide slows down, just add more water. Tuning slide grease serves two purposes. First, it allows the slides to be adjusted with ease. Second, it creates a seal keeping air from leaking out of the instrument. There are many options to lubricate your tuning slide and one isn’t necessarily better than the other. Some use tuning slide grease, others use cork grease, others use scentless Vaseline, and others use air tool oil. Use whatever you feel comfortable with. Just keep your tuning slides well lubricated. They should stay put when not touched, but should also be easily adjusted. Dents:2452090_orig Dents can be your worst nightmare! Be careful to make sure that your valve casings, trombone slides, and tuning slides remain dent free. Even the smallest dent can put your instrument out of commission and even after it’s fixed, your instrument will never be the same. If you get a dent, take it to your local repair tech and get it pounded out as soon as you can. The longer you play with a dent on those components; the more damage will be done to the instrument and the more costly the repair will become. Valve Guides anvalveguided Felts: Instruments with piston valves have valve guides to keep the valves aligned with the tubing and felts to keep the valves from clanking while playing. Keep an eye on those and replace them as needed. Your local repairman will charge an arm and a leg to replace these, but you can do it for yourself in minutes. All you need to do is purchase the right replacement part. Low Brass is the best! If you get good it can pay for college, but if you don’t take care of your horn, it won’t take care of you.

Proper Care and Feeding– Percussion

Another guest post from author Cris Stiles:

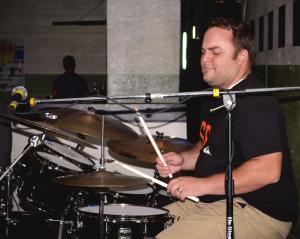
10453012_10154583275870392_4882139331910899883_oCris Stiles is a native of Huntington Beach, California where he graduated with distinction in Music from the Academy for the Performing Arts.  After graduation Cris Studied at Snow College with Scott Wilson, Jay Lawrence, and Lisa Verzella.  He then returned home to prepare for an LDS mission and played in several jazz combos under the direction of Tom Kubis.  After serving a mission in Northern Utah Cris decided to move to Salt Lake City and pursue his career as a music educator.  While attending SLCC he was a founding member of Craig Ferrin’s Studio Ensembles, a class designed to prepare musicians for real world music opportunities.  While in school Cris served as the Director of Marching Percussion at Bingham High School in South Jordan, UT form 2010 to 2012, also helping with their percussion ensemble and jazz band.  In 2013 He was asked to serve as Bingham’s Visual Caption head and took up the position of Director of Percussion at American Preparatory Academy in Draper, UT.  Cris is currently a Junior at the University of Utah where he is finishing his undergraduate degree in Music Education.  He is an active member of the percussion studio, performing in the Wind Ensemble, the Percussion Ensemble under the direction of Dr. Mike Sammons, and currently is a private student of Doug Wolf.  Cris has been a private music teacher since 2005 and is a member of the Gallatin Music teaching family in Murray, UT.

Instrument Care for Percussion

Welcome to being a percussionist! I’m assuming that if you’re reading this you’re one of three types of people; A student, just starting out on percussion and could use some tips of the trade to take care of your instrument, A teacher, looking for new ways to encourage your students to take care of some of the most expensive instruments in your band room, or a Pro, looking to reinforce the information you already know.

In grade school I played trumpet. Taking care of a trumpet was pretty easy. All you need to do is clean it every once and a while, oil the valves and be careful when taking it in and out of your case. But in the end it’s only one instrument. As percussionists we have TONS of different kinds of instruments to keep safe and maintain. Below I will offer 4 simple rules that should keep your equipment working and in good condition for years of students to play.

(Disclaimer for Teachers: As a band director or a private teacher you might get discouraged by the amount of upkeep it takes to maintain a percussion section. But in this post I hope to give you 4 simple rules that will help keep your percussionists sounding great and will take care of the instruments you spent your sacred budget funds on. If you will maintain your instruments like I will outline it wont prevent any injury to your instruments, but I can guarantee it will prevent most)

Bag It Up – Keep it Covered

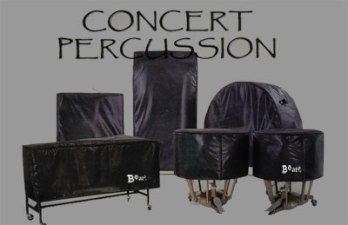
The first thing you can do for any percussion instrument is keep it stored in a bag or a case.  Too often when I visit band rooms I see percussion instruments stored in a drawer, or even a cabinet totally exposed. Whether it’s a triangle, tambourine, or a snare drum, CYMBALS (ESPECIALLY CYMBALS), or your mallets, these all should be stored in a case, and then stored safely on a shelf where they can return after each time they are played. When playing with multiple mallets, set them out on a stand but put a towel down first to keep them from becoming frayed.

If you have a keyboard instrument either in your band room or at home it’s important to always keep it covered. They keys aren’t as fragile as a small child, but it will keep them from accidental mishaps that happen everyday. You can’t put a marimba back in the box after you play it each time so keep it covered. (Teachers: Have your kids take some ownership. If you want them to take care of the instruments you have to show them it’s important to you.)

1600-CymbagPO729_detail2 beatoorchestr_01

Store It In The Same Place

A percussionist’s cabinet should be like a retired handyman’s tool box. Everything is in it’s right place, and it’s organized so it can be found easily. If it’s stored in a cabinet you have a couple advantages. First, it can be locked, that means no one else except your students and you are going to get into your percussion instruments. Also, most cabinets are padded so loose items, things already in cases are extra protected from harm. (Teachers: Keeping everything in it’s proper place will help show your students that it is important to you to keep the percussion instruments safe.)

Never Over-tighten Anything

In my career as a percussion teacher it is this single category where I have seen the most SERIOUS damage done to instruments. I’ve seen drum shells cracked, and hardware rendered totally useless by careless students who want to show their strength. Don’t be this kind of student. Stand nuts only need to be tightened finger tight (which means tighten it till it stops and then don’t tighten it anymore). If you are privileged to have a drum of your own or if a band director trusts you with tuning and tightening drumheads understand that less is always more. BE VERY CAREFUL! Don’t over tighten!

Also one of my biggest pet peeves is finding a stand grave yard at a school. They have overtightened and ruined a stand so they take the nuts from it and use it on something else.  Students and band directors become percussion salvagers. While this might be good if a stand is totally broken and the other parts are salvageable, then I say go for it, but if you’re taking working parts from one stand to use on another I think you’re missing the point. Parts can be ordered and it isn’t that hard to find replacement parts.

(Teachers: Explaining the phrase finger right to the students is really important in their early years. There are also resources for tuning and tightening tips at http://www.drumdial.com/drumtuning-
patterns.htm)

Use the Right Tool For the Job

Mallet choice can be very important when playing keyboard instruments.  Marimbas – only use yarn mallets, Xylophone – Rubber, Polyball (plastic) or Wood Mallets, Bells (Glockenspiel) – Polyball mallets are best, be careful of brass mallets. Chimes – rawhide mallets are the best, but you can use other harder mallets as well. Make sure to only play on the tops of the bars.  Bongos and Congas are meant to be played with the hands not hard drumsticks. Be smart, and
think through your tool choices.Innovative-Percussion-FP3

Proper Care and Feeding– Violin and Viola

Today’s post comes from a guest poster: clarissaClarissa Lunt is an orchestra teacher at Mar Lon Hills Elementary and Municipal Elementary in Weber School District, Utah. She is the Viola Section Leader with the Davis County Symphony in Utah and serves as the Public Relations Representative on the Symphony Board. Clarissa also teaches violin and viola lessons from her home in Ogden, Utah. Clarissa has a degree in Music Education emphasis in String Orchestra from BYU-Idaho and has played the viola for over 15 years. She worked at Ferguson Music Company as the Rental and Repairs Manager for four years while earning her degree. There she learned valuable lessons on string instrument care, maintenance and repairs. Clarissa has two beautiful daughters and loves being a mother. Her hobbies include reading, swimming, and mixed martial arts.

No Assembly Required!

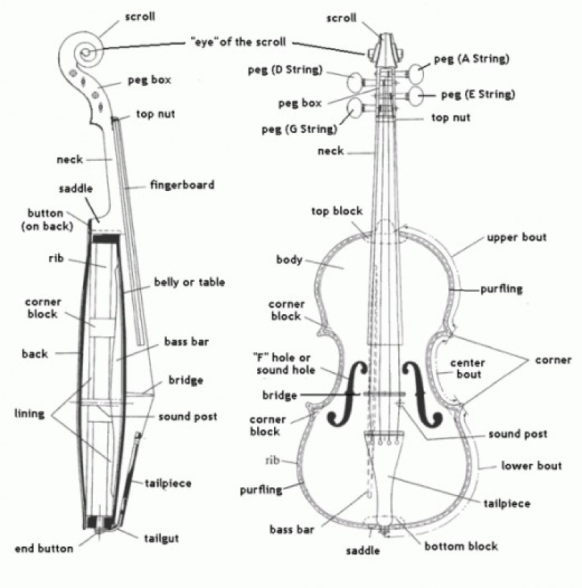
One of the great things about stringed instruments is there’s no set up requirements to play. You can simply take it out of the case and play. For beginners I always recommend you put the case face up on the floor before opening. Then take out your instrument by the neck or shoulder. Cellos and basses need to remove the bow from the case first. For all stringed instruments, remember to hold the bow by the stick – don’t touch the bow hairs. That’s it, now you can play! Violins and violas should attach a shoulder rest to the back of their instrument. Attach the feet securely to the back of the instrument. Adjust the shoulder rest so you’re most comfortable, for most this is when the scoop of the shoulder rest is underneath the chinrest. strings Tuning & Re-stringing I don’t recommend trying to tune or re-string a stringed instrument until you have been playing long enough to understand responsibility for your fragile instrument and have developed an ear for tuning. One thing to understand is that the pegs are actually slightly more cone-shaped than cylindrical. You need to push the pegs into the peg box while supporting the scroll when turning the pegs to get them to stay in tune. Turn the peg towards the scroll to make the string sound higher and towards the body of the instrument to lower the sound. It’s a pretty simple concept. However, developing the dexterity in your hands to push and turn and cradle the scroll at the same time is difficult for younger kids. Also, a quarter turn of a peg can adjust the sound as much as two whole steps (two white keys on a piano) depending on the size of the instrument. A whole turn could break a string. It’s best to start tuning with fine tuners to develop your ear before learning how to tune with the pegs. With fine tuners, turning right makes the string sound slightly higher, and turning left lowers the pitch of the string. Also, make sure you’re tuning the correct string. When I was in 8th grade, I had learned to tune my viola fairly well and a violin playing friend needed help tuning their A-string. So, I started turning the peg that would have been A on my viola, which was the E string on his violin and I accidentally broke his string. Oops! At least E strings are the cheapest string. If you are already experienced at tuning your instrument, re-stringing is easy. It’s easier to show you how to re-string than to explain it. Ask your teacher or someone who works at a violin shop to show you how to re-string. If you cannot learn in person, a video is the next best thing. Here’s an informative video on re-stringing a violin.

The Dos of Instrument Care

Do check for damage when you get your instrument and continue to check for damage routinely. When you first take your stringed instrument out of its case, check for cracks, scratches, dings, broken strings, etc. If this is a rental (either from school or from a store) notify the manager or teacher to make note so you are not held responsible for these scratches if/when you return the instrument. If you are renting from a store, sometimes you can talk the price down with the sales rep because of scratches. Cracks will need to be repaired. Sometimes cracks are hard to see. The hard-to-see cracks look like a lighter line in the grain of the wood. Press down firmly but gently with your finger next to the line, if it gets wider, it’s a crack. If it stays the same it’s either a crack that’s been repaired or that’s just what the wood of the instrument looks like. Sometimes cracks are an easy repair, sometimes they’re more expensive – it depends on the size and location of the crack. I regularly check for cracks on my violin and viola whenever there is a change in seasonal weather – that’s when wooden instruments are most prone to cracking. Broken strings are an easy fix and most stores will restring a violin for only the cost of the string. If you’re renting from a music store and the instrument has a broken string, sometimes they’ll replace it for free.

Do keep your instrument stored at room temperature. String instruments are made of wood. Wooden instruments are susceptible to temperature changes. Just like when the weather changes outside your wooden front door is hard to open, string instruments change with weather change. If a stringed instrument gets too hot, the varnish will melt. If a stringed instrument gets too cold, the wood can crack. My recommendation is if you wouldn’t be comfortable with the temperature where you’re leaving your stringed instrument, don’t leave your instrument there either, even if it’s in its case.

Do use rosin. Rosin (dried tree sap) is essential to playing with the bow. Rosin sticks to the horse hair on the bow and makes the horse hair sticky. The horse hair is then able to pull the string to produce a sound with the bow. I rosin my bow for approximately every three hours of playing. If I’m practicing three hours a day, then I rosin every day. If you’re a beginner and only playing about three hours a week of combined class and practice time, then you only need to rosin once a week. If you have a new bow, or it has recently been re-haired, you will need to rosin a lot to get your bow to play correctly. Here’s a video explaining how to apply rosin to your bow.

Do use a shoulder rest or sponge. Shoulder rests help support the violin on your shoulder. They add padding for shoulder comfort and fills the space from the shoulder where the violin rests to the chin (which helps stabilize the violin on your shoulder ) so you’re not straining your neck trying to clench the violin onto your shoulder (clenching is bad). As much as I LOVE my students to own a shoulder rest, there are some brands of shoulder rests out there that areshoulderrest prone to scratching the instrument. Make sure the feet or prongs of the shoulder rest that attach onto the lower bout of the instrument are plastic or rubber. Some shoulder rests have metal feet that scratch the wood of the instrument. If you cannot afford a good quality shoulder rest, I recommend getting a soft sponge and using that as a shoulder rest by attaching it to the instrument with a rubber band connected to the back corner and the end button. I used a sponge as a shoulder rest for the first couple years of playing viola and it worked quite well. If you’re looking for a shoulder rest and don’t know where to start, I like the KUN brand shoulder rests. They’re the easiest to adjust to your comfort needs and also the easiest to replace parts if they break.

Do wipe off the rosin dust and finger prints. All you need is a soft cloth. It doesn’t have to be a special instrument polishing cloth that music stores try to sell you for $2. Any cloth or rag that is soft, lint-free, and clean will work. I use a clean burp rag that my babies have outgrown. Gently wipe off the rosin from the wood of the instrument. Then gently rub the rosin off the strings too. It is best to wipe off the rosin daily to avoid having rosin dust caking on the strings or the wood and causing the strings to wear quickly or the wood to become permanently sticky.

Do put away securely. A lot of damage I’ve seen to instruments in the classroom happens when students are putting their instruments away or if their instruments are left unattended (which rarely happens in class). Make sure you latch all the latches, stick all the velcro, zip all the zippers, etc. All students, make sure you loosen the bow before putting it away. The tip is very fragile and if left tightened while stored, it puts lots of strain on the bow and will crack and break over time. Violins and Violas make sure you remove your shoulder rest before putting your instrument in its case. If the lid closes on the instrument with the shoulder rest on the back, it will crack. Put the shoulder rest in a shoulder rest compartment of the case, or if your case does not have one, in a music bag. Also, make sure your bow is latched in place before closing the lid, the bow could scratch the wood.

The Don’ts of Instrument Care

Don’t leave your instrument in the car. There are three reasons not to leave your instrument in the car.

  1. It could get too hot and the varnish could melt which is irreparable.
  2. It could get too cold and the wood could crack which is expensive to repair.
  3. It could get stolen.

Don’t leave unattended. If you’re done practicing your instrument, put it back in its case securely. Be especially careful if you have dogs, cats, or young children in your home. Students will put their instrument down for a second to get a drink of water and the next thing they know their dog, cat, or baby sister is using their violin as a chew toy.

Don’t try to fix the instrument yourself. When I worked at Ferguson Music Company, I would get rentals returned with screws or super glue holding the wood together. Even wood-glue is bad for a stringed instrument. Stringed instruments are works of art that appreciate with value if made and maintained with care. In order to get the best acoustics from an instrument, violin makers use special glue, varnish, and tools to create an instrument that sounds beautiful and will continue to sound beautiful for thousands of years. Some people may know what they’re doing with nails, screws, super glue, and wood glue, and it may even hold the instrument together and it might even play, but the vibrations from playing on these repairs cause even more damage to the instrument. Often the damaged caused by fix-its is more expensive to repair than the original damage to the instrument.

Don’t use household cleaners on your instrument. Along the same lines of “don’t fix the instrument yourself.” Household cleaners cause irreparable damage to stringed instruments. Even pledge and wood polish are bad for instrument varnish. One time, when I worked at Ferguson Music, a customer brought in her violin and the varnish had melted. I asked what had happened and she said she had used Windex to clean it. The varnish was irreparable and we had to strip all the varnish off along with a layer of wood and re-varnish the instrument. If you need to clean your instrument, use special violin cleaner and polish. Don’t polish too often though, too many layers of polish deaden the sound of stringed instruments. I only polish once a year.

Don’t touch the bow hair. The horse hairs on the bow have many microscopic ridges on them. When applied with rosin, the horse hairs grip the instrument’s strings and pull causing it to vibrate and ring with sound. Our skin has many natural oils. When you touch the bow hair with your hand, the oils from your hand fill up the ridges in the horse hair making the bow ineffective, or at least making it not sound so pretty. Bow hair that has been touched too many times turns yellow, then brown, then black and it sounds scratchy.

Don’t touch the pegs until you learn how to tune. The number one reason a string breaks is a student has turned the peg too far. I don’t teach my kids to tune their own instruments until they’ve been playing a year or more. They need to show responsibility for their instruments and learn how to tell if they’re in tune. They need to demonstrate the ability to tune with the fine tuners before I’ll let them use the pegs. Your teacher can tune you in your lessons. If you need your instrument tuned in between lessons, take it to a music store – they usually tune it for free.

Resources:

“Violin Bow Parts Diagram.” Becuo. September 2009. http://becuo.com/violin-bow-parts-diagram

“Kun Original Violin Shoulder Rest” Shar. 7 February 2015. http://www.sharmusic.com/Accessories/Shoulder-Rests/Kun-Original-Violin-Shoulder-Rest-fits-3-4—4-4-size.axd#sthash.9l2Dt5OC.dpbs

Proper care and Feeding– Flute and piccolo

Melissa Stone (aka the admin and primary author of this blog) has been studying music since she was 5-years-old, but aspired to a musical life at the young age of 3.  She began with piano, studying on and off for 9 years.  When she entered junior high she began to pursue her true love, the flute.  After a difficult high school band experience she decided to study music in college to help spread her love of music and help provide good music instruction.  She studied flute with Dr. Virginia Stitt at Southern Utah University, Pat George, and Angela McCabe, at Brigham Young University– Idaho, and Lisa Byrnes of the Utah Symphony.  Upon leaving BYU-Idaho Melissa taught at American Prepartory Academy charter school in Utah for one year before becoming a stay at home mom.  Melissa currently teaches private music lessons, chases her two boys, and assists local band directors as a specialist. Of all the woodwind instruments flute seems to be the lowest maintenance.  Flutes don’t require reeds, cork grease, or humidity.  Really all a flute requires for basic care is a little tender love, regular swabbing, and an occasional polish.  But don’t let it fool you, the flute can be a temper-mental beast with all its tiny moving parts, tuning cork, small pads, and easily upset springs.  So let’s talk the proper care and feeding of flutes (we’ll get to piccolos in a bit).

Cases:Flute-in-case-takedown The first thing you need to know about flute care is that the flute is loaded with delicate bars and springs that, if bent even the tiniest bit, can really wreak havoc on way the instrument works.  Flutes should be kept in their original case whenever possible, an “after market” case may not hold your particular flute properly– either too loosely or too tightly– and can cause damage to those delicate rods that make the keys of the flute work or cause dents, scratches, and other damage to the instrument.  Flute cases are designed with the particular make and model they accompany, if a case is damaged try to find one that is made for your particular flute, the best chance for doing this is to contact the manufacturer.  Flute cases, and really any instrument cases, are designed to protect the instrument from general bumps and jostling, they are not made to withstand large amounts of weight such as might be applied by being stepped or sat on.  Placing excess amounts of weight on any instrument case will cause the case to bend thus also bending the instrument and/or its mechanical parts– DO NOT SIT, STAND, OR OTHERWISE PLACE LARGE AMOUNTS OF WEIGHT ON YOUR INSTRUMENT CASE.  Another thing to note about cases is that they are only designed to hold the instrument itself, not cleaning tools, music, wallets, chapstick, etc.– DO NOT STORE ANYTHING IN YOUR CASE THAT DOESN’T BELONG— the only exception to this is if your case has a special compartment for storage of such items as reeds and supplies (flute cases don’t have these compartments).  Cleaning rods, cloths, and other supplies should be kept outside the case, many flute cases have an inner hard case and an outer soft case that has pockets or enough space to store these supplies.  Also, try to avoid leaving the instrument and its case in extreme temperatures such as outdoors or in a hot car.

Assembly: Flute assembly is pretty straight-forward.  The flute is made up of three parts, the head joint, middle joint, and foot joint.  The head joint is the top piece with one closed end and the lip plate and tone hole, the middle joint is the longest piece with most of the keys, the foot joint is the smallest piece.  To assemble the flute carefully remove the middle joint from the case by the barrel– this is the top end of the joint with no keys on it, generally about two inches with thicker bands of metal on either end– and remove the head joint from the case.  Insert the open end of the head joint into the barrel with a gentle twisting motion until it won’t go in any further.  Remember, don’t force anything into a place it doesn’t want to go or you will cause damage, if the pieces should go together but won’t gently clean both joints then rub the outside of the joint end or tenon of the head joint and the inside of the barrel with your fingers to apply oil from your hands, this will lubricate the tenons and should help them go together easier.  Once the head joint is in place hold the flute by the barrel and remove the foot joint from the case by the end that has no keys, insert the tenon end of the middle joint into the keyed (tenon) end of the foot joint with a gentle twisting motion until it won’t go in any further, if you need a closer grip to the foot joint you can hold the middle joint below the barrel, careful not to grip the keys and rods tightly as you twist.  Now you need to line up you flute.  Holding the flute horizontally with the keys on the middle joint pointing straight up, look down the length of the flute from the end of the foot joint there should be a beam of light that shines down the center of the keys, this beam of light should also shine down the center of the tone hole on the head joint, in other words, the tone hole should point straight up.  The foot has a bar that holds the keys, in general this bar should line up near the center of the keys on the middle joint, however, if the player’s right hand pinky is shorter or longer the foot joint can be rotated to accommodate a comfortable playing position for the pinky finger.

Disassemble:  I recommend taking the instrument apart vertically.  The tenons are metal and thin and taking them apart vertically prevents bending and misshaping of the tenons from natural arm motion.  When taking the instrument apart horizontally the arms have a natural tendency to move in an arc that, when repeated over time, bends and reshapes the delicate tenons on the head joint and middle joint to oval-like shapes rather than perfect circles this making them not fit together properly and resulting in costly repairs.  To remove the head and foot joints hold the flute with the joint at the top and with a gentle twisting motion pull the joint from the middle joint in an upward motion and replace the removed joint in its place in the case.  Once the instrument is taken apart swab out any moisture.

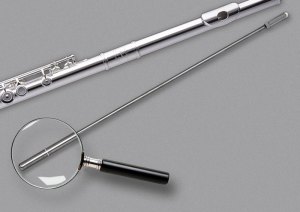
Swabbing: The best thing you can to do keep your flute in good, clean, working order is to remove as much moisture asHeid_Flute_and_Clarinet_Swab1 possible after every use.  This is done by threading the corner of an absorbent cloth (silk, cotton, flannel, etc.) through the eye of the cleaning rod and sliding it through each joint.  The foot joint and middle joint can each be swabbed by pushing the cleaning rod through the joints two to or more times.  To swab the head joint wrap the cloth over the end of the cleaning rod and gently push it into the head joint until it touches the tuning cork in the top of the head joint, DO NOT push hard or you will upset the tuning of the instrument, slide it gently in and out a few times to remove moisture.  The swab cloth should be washed at least monthly without fabric softener or dryer sheets to maintain absorbancy.  Music stores may try to sell you caterpillar looking swab sticks– these swabs may be cute and fuzzy, but they will leave fibers in your instrument.  These fibers collect and hold moisture inside the instrument causing bacteria build up and damage.  P

Polishing:  Many flute players like their instrument to be shiny, and this is all well and good, but polishing should not be done too often as it can ruin the finish that makes the instrument shiny.  Once a week an untreated cloth, such as a swab, can be used to wipe off finger prints and oil to prevent tarnish.  Once a month, at most, a treated polishing cloth can be used to restore a brilliant luster.  NEVER use liquid polish or take keys or rods off your flute to polish it.  Liquid polish can get into the mechanism of the flute and cause it to malfunction and unless you are a trained repairman you should never try to loosen or tighten screws that attach anything to the instrument. efcr_m

Tuning:  Tuning of the flute is simple, if the instrument is playing sharp simply pull the head joint out from the foot joint a little to elongate the instrument, if it is flat push the head joint in (unless it won’t go in any further).  If a flute is perpetually flat to the point that the head joint cannot be pushed in any further or perpetually very sharp the tuning cork may be out of place.  Using the cleaning rod that belongs to the instrument you can adjust the tuning cork to the proper placement.  Inset the non-eye end of the cleaning rod into the head joint, there will be a line marked on the cleaning rod, this line should line up in the center of the tone hole.  If it does not line up properly tighten the crown screw to move the cork up or loosen and push on the crown to move the cork down.  Remember that this only works correctly with the cleaning rod that originally came with the instrument, “after-market” cleaning rods will have the tuning line, but will not be marked for the specific manufacturer or flute so they may not be marked correctly.  Young students should not be shown how to do this as the often abuse it and can cause the cork to come loose.

Springs:  These tiny metal rods on the flute help keep tension in the rods so that keys function properly and together.  Springs can be knocked loose while polishing and sometimes come out of place during playing especially if they have come loose from their f008ittings and have lost their tension.  Springs can be easily put back in their place with the tip of a pencil or fingernail.  If a spring seems to have lost its tension the instrument needs to be taken for repairs.

Rods and screwsNEVER LOOSEN OR TIGHTEN A SCREW ON YOUR INSTRUMENT.  I also don’t care how handy your dad or neighbor, or uncle, or grandfather is with a toolbox, they are not trained to fix you instrument, don’t let them try to fix it either.  The rods that hold the keys on your instrument are held on by miniscule screws that are calibrated to proper tensions so as to allow the rods to turn as needed, tightening or loosening these screws will cause your flute to malfunction and require repairs.  The only exception to this rule is the screw on the thumb key on the back of the flute.  Because the thumb key is used often this screw has a tendency to come loose and if it comes too loose the rod and key may come off the flute, when the screw looks loose use a small flat head screwdriver or your fingernail to tighten it until it is flush with the end of the rod post.

Pads and keys:  The best way to care for the pads on the underside of the keys is to keep them dry by removing as much moisture from the flute as possible and by not playing outdoors in wet conditions such as rain or snow.  Also, avoid touching the pads as oils from your hands can cause them to break down.  If you find that a pad isn’t sealing properly, or is leaking, the pad needs replaced and should be taken for repairs.  If a key isn’t moving the way it is supposed to check for loose or displaced springs, if all springs appear to be in place ask your teacher and/or take the instrument in for repairs.

Piccolo:  Doesn’t differ much from flute except that there are only two pieces to assemblrespice and it is significantly smaller.  Full metal piccolos have the same care requirements as flutes, resin or plastic/part plastic piccolos also have the same basic care requirements except that the tenon between the head joint and body usually has a small cork that requires small amounts of cork grease occasionally.  Wooden piccolos need to be kept in a temperature controlled environment and playing one outdoors should be avoided at all costs, it is especially important to never leave wooden instruments in extreme temperatures as this could crack the wood and ruin the instrument.

I hope that you were able to learn something about caring for flutes.  They seem to on of the more simple instruments to care for, but proper care and feeding of your flute and/or piccolo will ensure that it will function properly and you will spend significantly less on repairs than if you do not take good care of it.

Proper Care and Feeding

As music teachers we all know that our instruments and equipment need to be properly taken care of to function.  Each instrument and piece of equipment has different functions and therefore different requirements for its proper care and maintenance.  Over the next several weeks I will be bringing in many guest writers to help me with a series of posts on the “proper care and feeding” of instruments and equipment that we deal with on a regular basis.  These posts will be great refreshers for those things that we don’t do every day, they will hopefully provide tips and tricks that you may not have considered before, and hopefully can be a resource when teaching students how to care for their instruments. From my experience I know that all instruments need to be regularly cleaned and maintained to stay in good working order.  Unfortunately many kids aren’t taught the importance good cleaning and care habits from day one because we aren’t familiar with the individual quirks of each instrument.  This ends up in broken instruments and other equipment.  To start, here are a few general tips that kids should be aware of from day one.images

  • Instrument cases are sturdy enough to keep an instrument safe from normal bumps and jostling.  NOT included in this normal usage is sitting, standing, or other ways of placing large amounts of weight on the case.  Too much weight on the case, in any direction, causes the case to bend in places it shouldn’t bend and will damage the instrument inside.
  • Along these same lines, instrument cases are not designed with extra room in them to store music and accessories, except in special, built-in compartments and/or pockets.  This means don’t keep your music in the lid of your trumpet, violin, or saxophone case, don’t store your flute swab or polishing cloth in the lid either.  Cleaning accessories should be stored in the spaces provided in many cases or kept outside the case (many smaller instrument cases have exterior pockets that are great for keeping swabs, etc. in).
  • Don’t store swabs inside your instrument!!!  Music stores are in the business of making2189_1 money, they will often try to sell you things you do not need, including those fuzzy swab sticks that they say you can just leave inside your instrument to keep it dry.  This is a lie!  Any swab, when left inside an instrument does not get the proper air exposure to dry thoroughly and will damage your instrument inside by causing mold and leaving lint inside and can damage the pads by leaving moisture behind.  Don’t buy the cute fuzzy sticks, stick to the traditional cloth swabs that are easy to fold and store compactly, these dry better and don’t leave behind lint.
  • Wash your cleaning cloths and other care implements regularly, once a month at least.  I recommend not using fabric softener or dryer sheets when you do this.  Aside from the fact that many of the care instructions that come with these items specifically say not to use fabric softener, it also often prevents fabrics from being as absorbent as they should be and therefore leaves them ineffective.
  • Clean your instrument every time you use it.  Swab out woodwinds, empty brass spit valves, wipe down finger boards and rosin from the bow and strings, every time.  This prevents build up of bacteria, oil, and other substances that can damage your instrument, make your instrument not function properly and can also make you sick.
  • If it breaks don’t try to fix it and don’t let your handyman dad or neighbor try to fix it either.  You and your dad are not trained on how to fix instruments, so don’t even try it.  Consult your music teacher, and/or a repair person, they have special training to fix these things.  The tiniest things can make any instrument malfunction and if you don’t know what you are doing you can potentially make the problem worse and more expensive to fix.
  • Don’t use polishing cloths daily.  These wear down the finish on metals and wood and will make your instrument less shiny over time.  Do wipe off fingerprints regularly to avoid tarnish and oil wear, but do this with an untreated, soft cloth.  Only polish once a month at most.
  • When not in use, store your instrument in its case.  This is the best place to keep your instrument away from curious children’s hands, pets, dangerous feet, and other unfortunate mishaps that can do significant damage.
  • If it doesn’t go, don’t force it.  This goes for tuning pegs, mouthpieces, ligatures, swabs, and cases.  If a mouthpiece won’t go in,13th-chair-theme-header don’t force it in, if a tuning peg won’t turn, don’t muscle it to make it turn, of a swab won’t go in or come out, don’t keep pulling, if a case won’t close don’t make it close.  These things happen for many reasons and forcing things to work that don’t seem to want to work will probably cause problems or break something.  Get some help if something that used to work doesn’t any more or if something should work, but isn’t.
  • If its not yours, don’t touch it.
  • NEVER leave an instrument to rest on an elevated surface unattended.  Music stands and chairs are not safe places for instruments, they can get knocked off and fall, causing dents, bent keys, broken wood, and so much more.
  • Instruments and other equipment are not weapons.  You can’t beat your neighbor over the head with your trombone and expect it to work.
  • When opening your case be sure that it is right side up.  Opening a case upside down can make you drop your instrument resulting in damage.

These are all general tips for taking basic care of all musical instruments.  Students should be made aware of these, but also need to know instrument specific care.  Stick with me over the next several weeks for instrument specific care instructions written by people who know what they are talking about.  Also stay tuned for posts about classroom equipment care and electronic equipment care.